How To Build Your Own Bookcase: A Step-by-Step DIY Guide
Building your own bookcase is one of the most rewarding DIY projects you can tackle. Whether you're a beginner or an experienced woodworker, creating your own bookcase allows you to personalize your space while saving money. Picture this: a sturdy, stylish bookcase that matches your home decor perfectly, crafted entirely by your own hands. Sounds exciting, right? Let's dive into why building your own bookcase is a game-changer for your home improvement journey.
There’s something magical about creating something with your own two hands. When it comes to furniture, a custom-built bookcase not only adds functionality but also reflects your unique taste. Plus, it’s a project that doesn’t require a PhD in carpentry—just some basic tools, patience, and this step-by-step guide. We’ll walk you through every part of the process so you can build a bookcase that lasts for years.
Before we get into the nitty-gritty, let’s talk about why DIY bookcases are such a hit. They’re budget-friendly, customizable, and way more satisfying than buying something off the shelf. Plus, they’re a great way to upskill and impress your friends and family. So, if you’ve ever thought, “How do I build my own bookcase?”—you’re in the right place. Let’s get started!
- Short Hair For 50yearolds The Ultimate Guide To Finding Your Perfect Style
- Hairstyles With Glasses And Bangs The Ultimate Guide For A Flawless Look
Why Building Your Own Bookcase is Worth It
Building your own bookcase isn’t just about saving cash. It’s about creating something that fits your space perfectly, whether you need a towering library for your novels or a small shelf for your favorite knick-knacks. Here are some reasons why this DIY project is worth the effort:
- Customization: You get to choose the size, style, and materials, so it matches your home perfectly.
- Quality Control: Store-bought bookcases often use cheap materials. When you build your own, you can ensure durability and strength.
- Cost-Effective: Materials for a DIY bookcase are often cheaper than buying a pre-made one.
- Personal Satisfaction: There’s nothing quite like the pride of crafting something with your own hands.
Think about it—why settle for a generic bookcase when you can create something that truly reflects your personality? This project isn’t just about functionality; it’s about adding a personal touch to your living space.
Tools and Materials You’ll Need
Before you start building your bookcase, gather all the necessary tools and materials. Having everything ready will save you time and frustration later on. Here’s what you’ll need:
- Beautiful Haircut Transform Your Look With These Stunning Styles
- Hairstyles For Over 50 With Thick Hair Embrace Your Natural Beauty
Tools:
- Circular saw or handsaw (depending on your preference)
- Drill with various bits
- Screwdriver
- Measuring tape
- Level
- Square
- Carpenter’s glue
- Sandpaper
- Clamps
Materials:
- Wood planks (pine, oak, or MDF, depending on your preference)
- Wood screws
- Wood glue
- Paint or wood stain (optional)
- Varnish or polyurethane for protection
Pro tip: Always buy a little extra material just in case. Trust me, you’ll thank yourself later if something goes wrong or you make a mistake.
Step 1: Planning Your Bookcase
Every great project starts with a solid plan. Before you cut a single piece of wood, sit down and figure out the specifics of your bookcase. How tall do you want it? How many shelves? What style are you going for? These questions will guide your design process.
Here’s a quick checklist to help you plan:
- Measure the space where you’ll place the bookcase.
- Decide on the number of shelves and their spacing.
- Choose the type of wood you’ll use based on your budget and aesthetic preferences.
- Sketch a rough design or use a free online tool to visualize your bookcase.
Remember, planning saves time and materials. Don’t rush this step—it’s the foundation of your entire project.
Step 2: Cutting the Wood
Now that you’ve planned your bookcase, it’s time to cut the wood. This is where things get hands-on. Follow these steps carefully:
- Measure and mark the wood according to your design.
- Use a circular saw or handsaw to cut the pieces. If you’re new to this, take your time and double-check your measurements.
- Smooth out the edges with sandpaper to prevent splinters.
Pro tip: If you’re not confident in your cutting skills, many hardware stores offer cutting services. Just bring your measurements, and they’ll do the heavy lifting for you.
Common Mistakes to Avoid
When cutting wood, accuracy is key. Here are a few common mistakes to avoid:
- Not double-checking measurements before cutting.
- Rushing the process and making uneven cuts.
- Using dull blades, which can lead to rough edges.
Take your time, and don’t be afraid to ask for help if you’re unsure about anything.
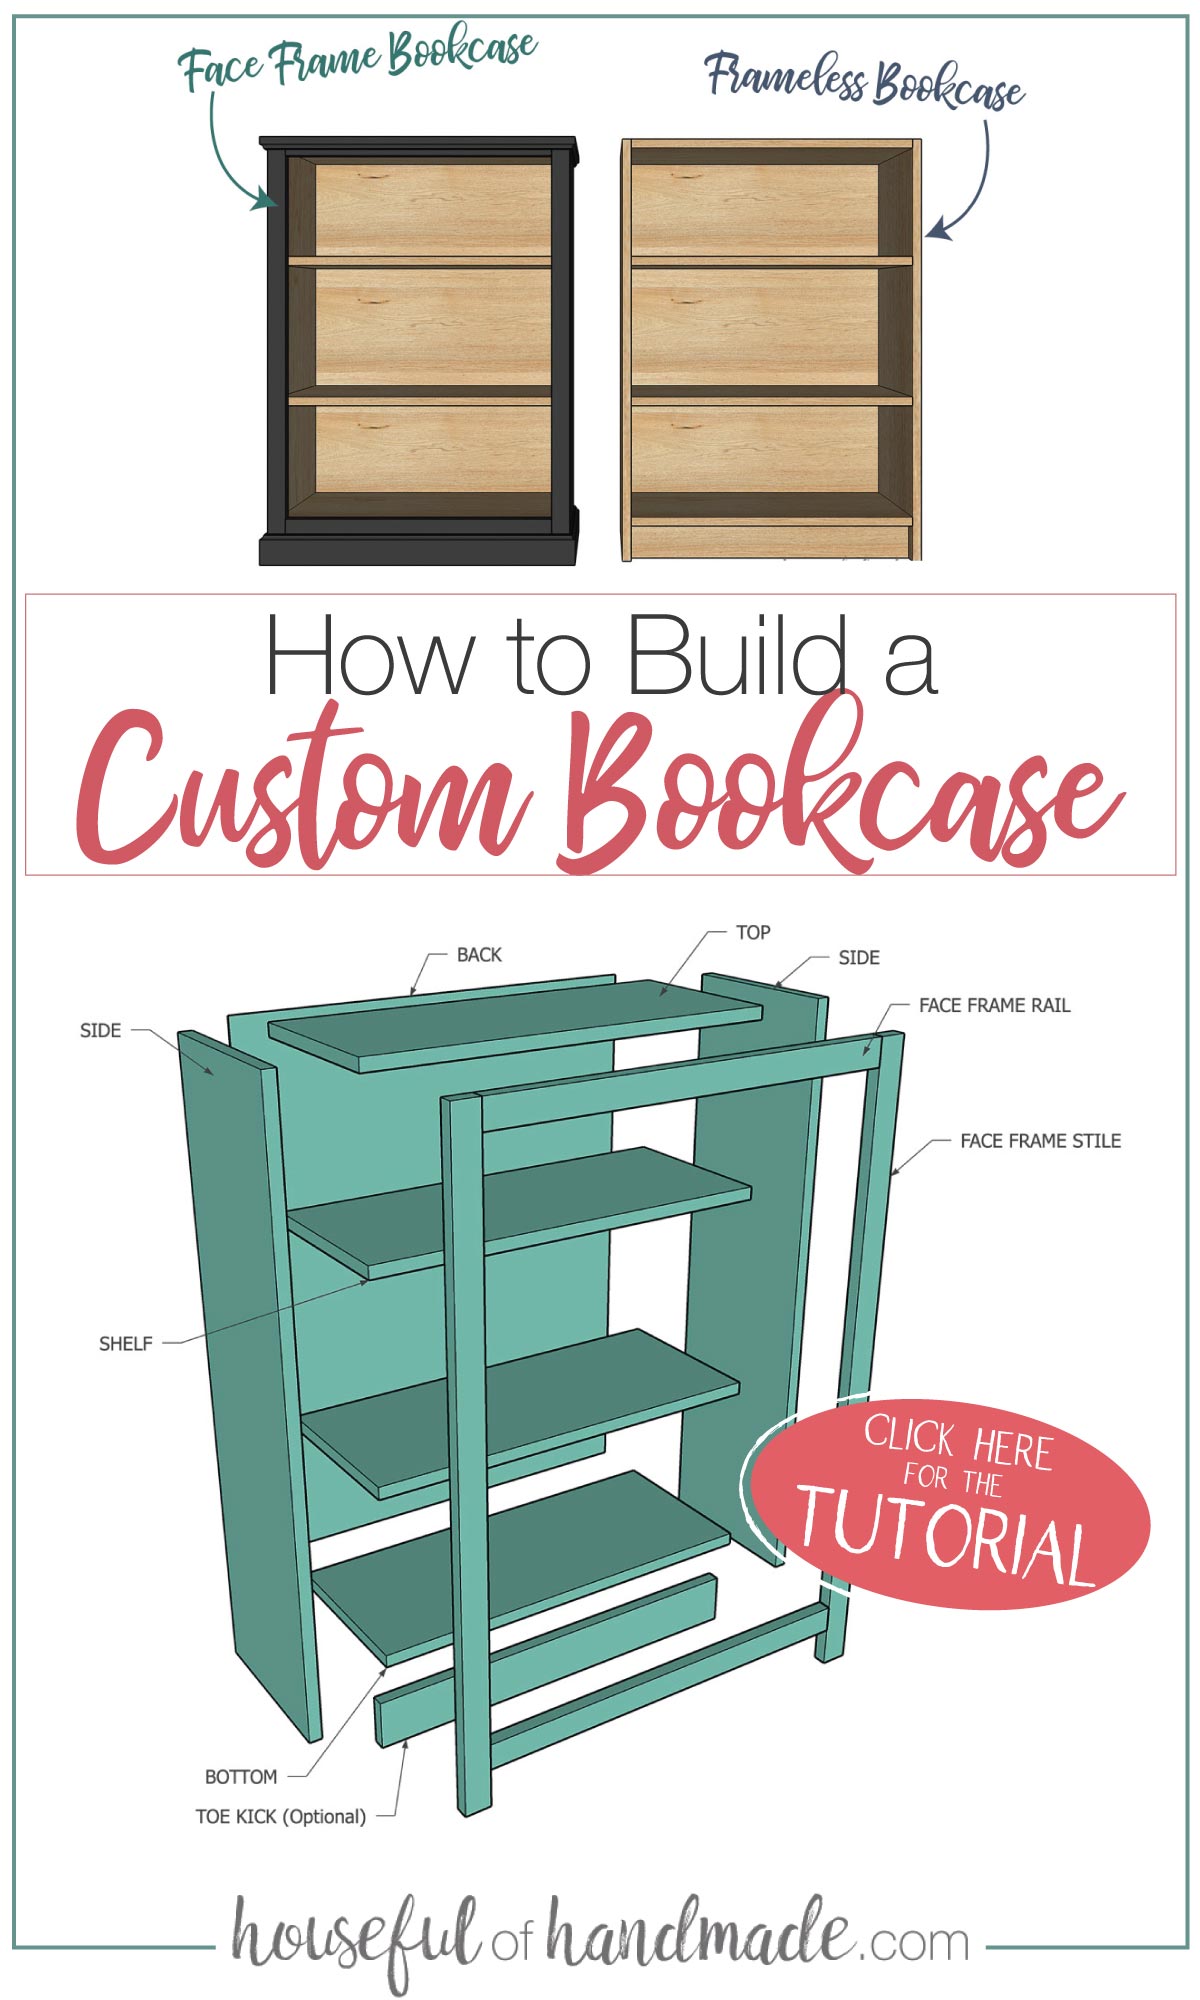
Step 3: Assembling the Frame
With your pieces cut and smoothed, it’s time to assemble the frame of your bookcase. This is where the structure starts to take shape. Here’s how you do it:
- Start by attaching the sides of the bookcase to the top and bottom pieces using wood screws and glue.
- Make sure everything is square and level as you assemble. A carpenter’s square is your best friend here.
- Once the frame is assembled, reinforce the corners with clamps to ensure a strong bond.
Pro tip: Use wood glue in addition to screws for extra strength. Just make sure to wipe off any excess glue with a damp cloth while it’s still wet.
Step 4: Adding the Shelves
Now it’s time to add the shelves to your bookcase. This step requires precision, so take your time. Here’s what you need to do:
- Measure and mark the positions for each shelf on the sides of the bookcase.
- Attach the shelves using wood screws and glue, ensuring they’re level and secure.
- Reinforce the joints with brackets or additional screws if needed.
Pro tip: Consider adding adjustable shelf supports if you want flexibility in the future. This allows you to change the spacing of your shelves as needed.
Why Adjustable Shelves Matter
Adjustable shelves give you the flexibility to store items of different sizes. Whether you have oversized books or small trinkets, having the ability to adjust your shelves makes your bookcase more versatile.
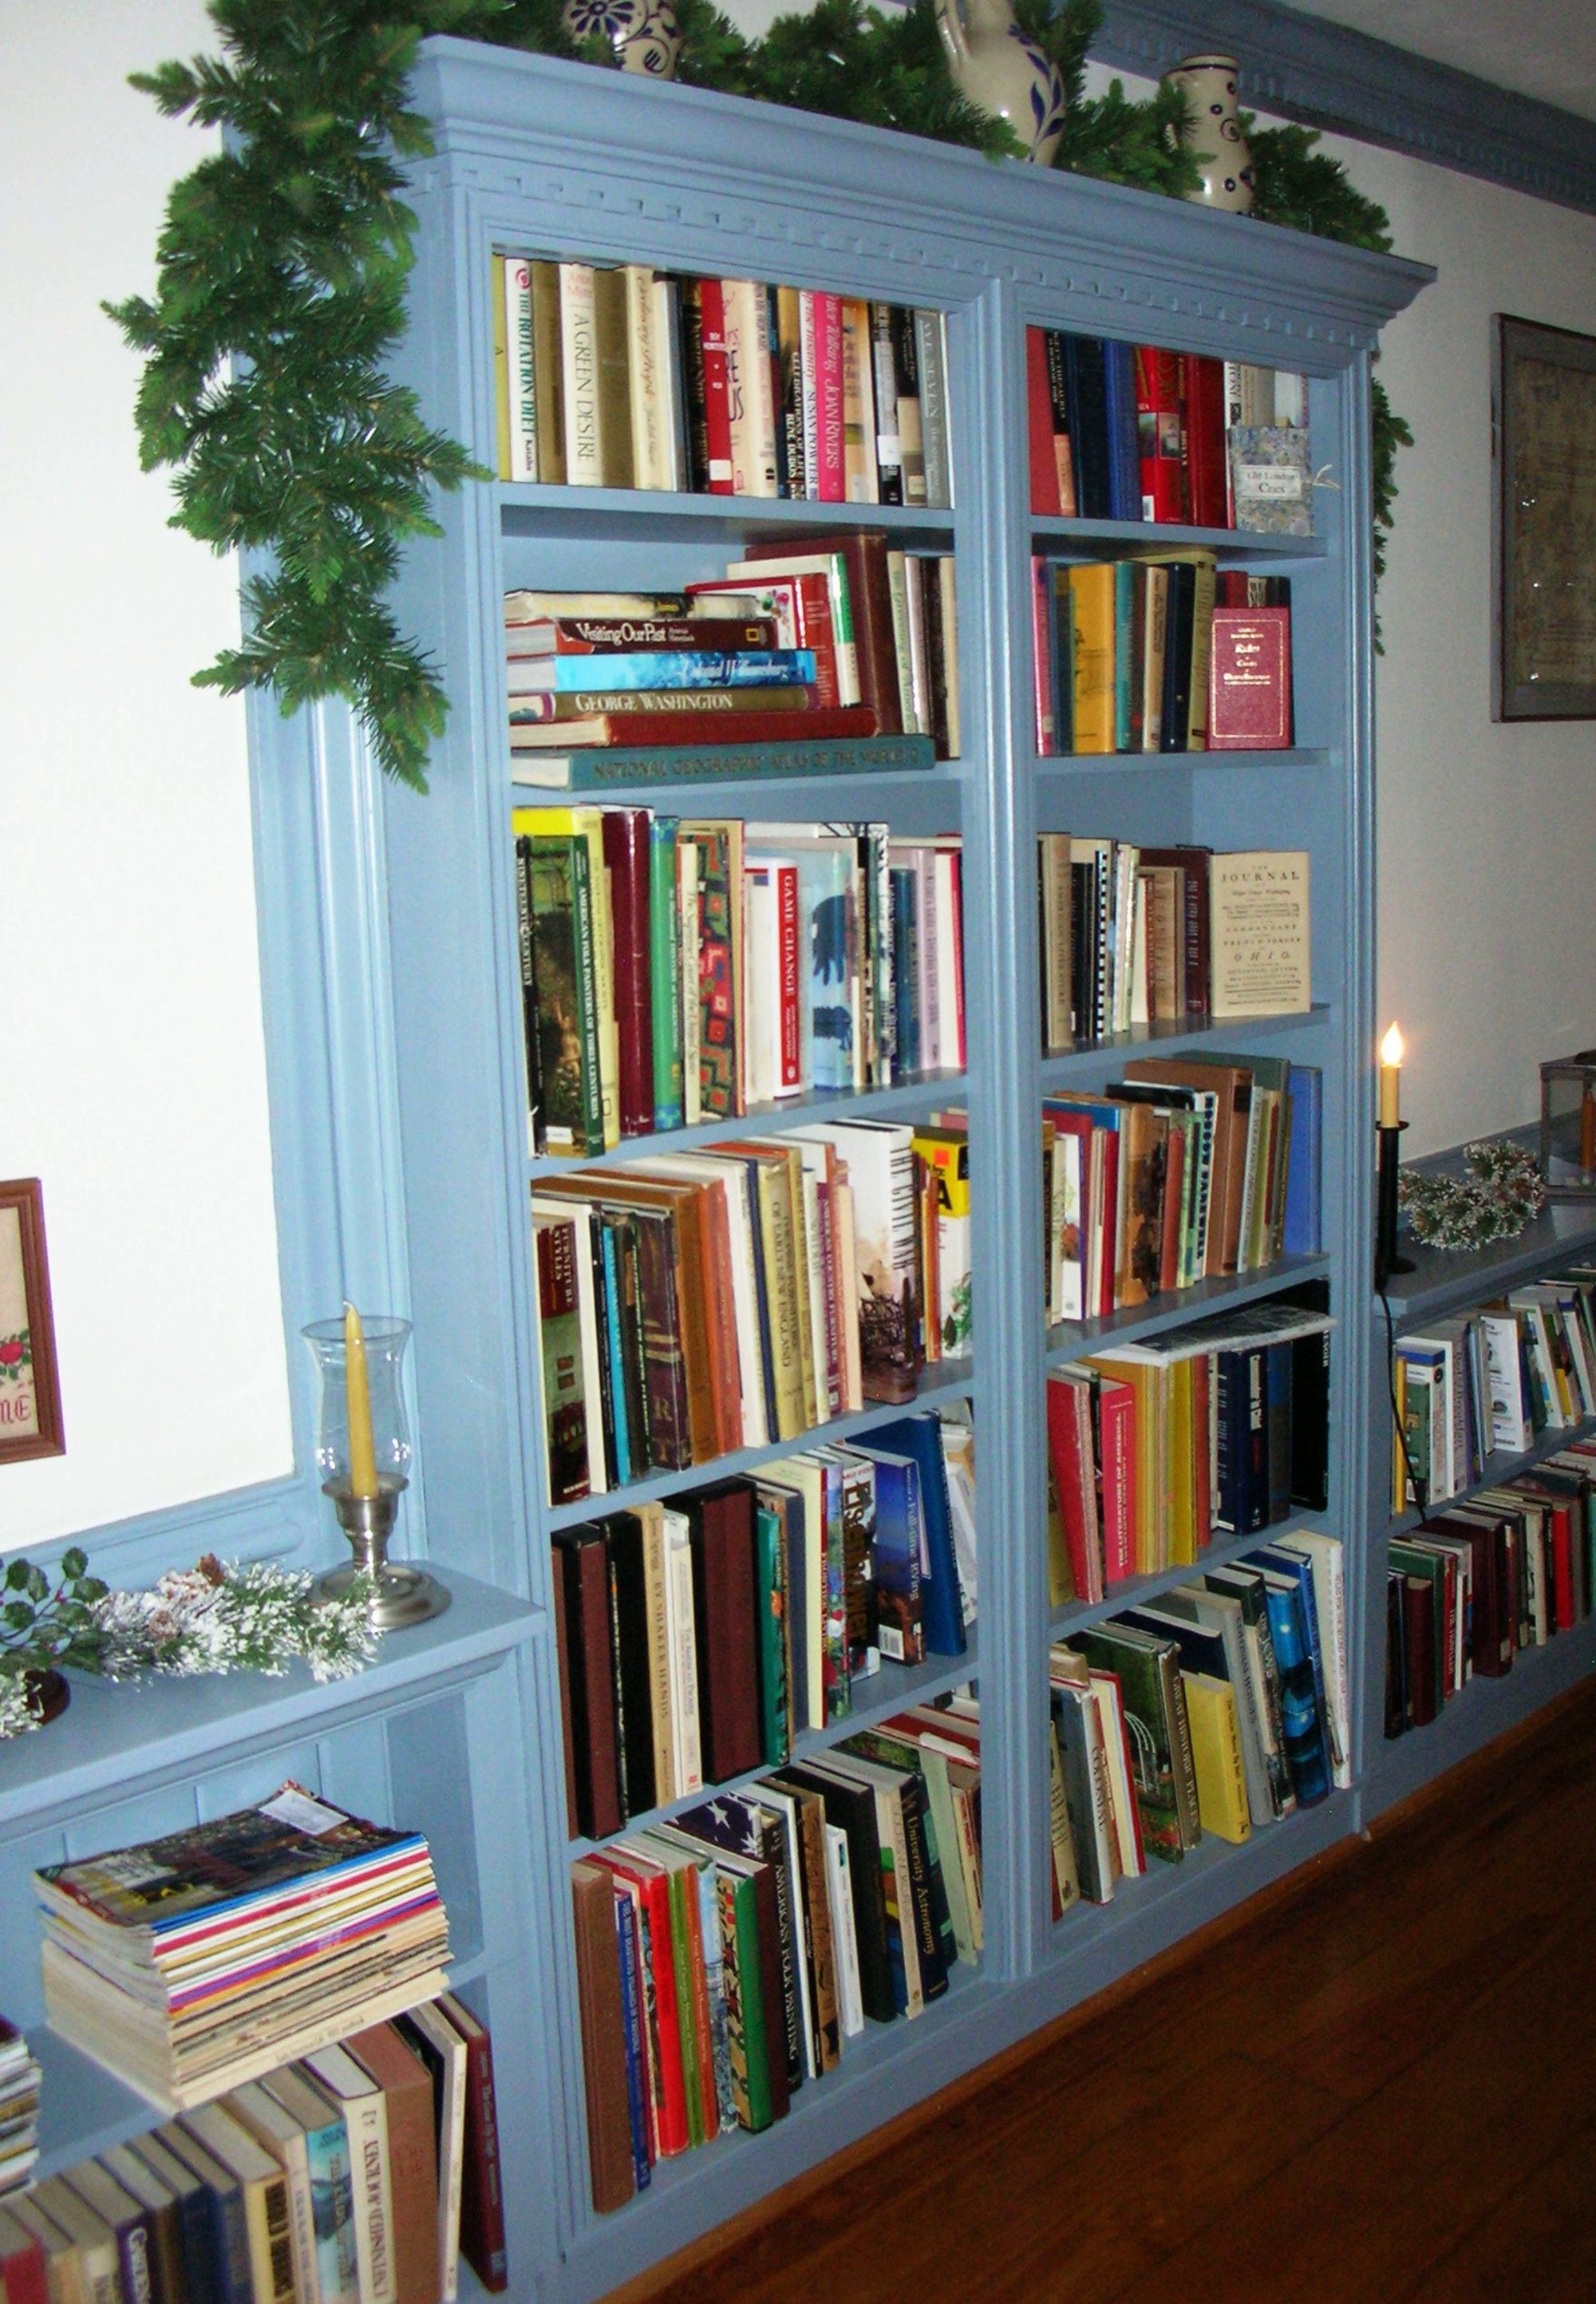
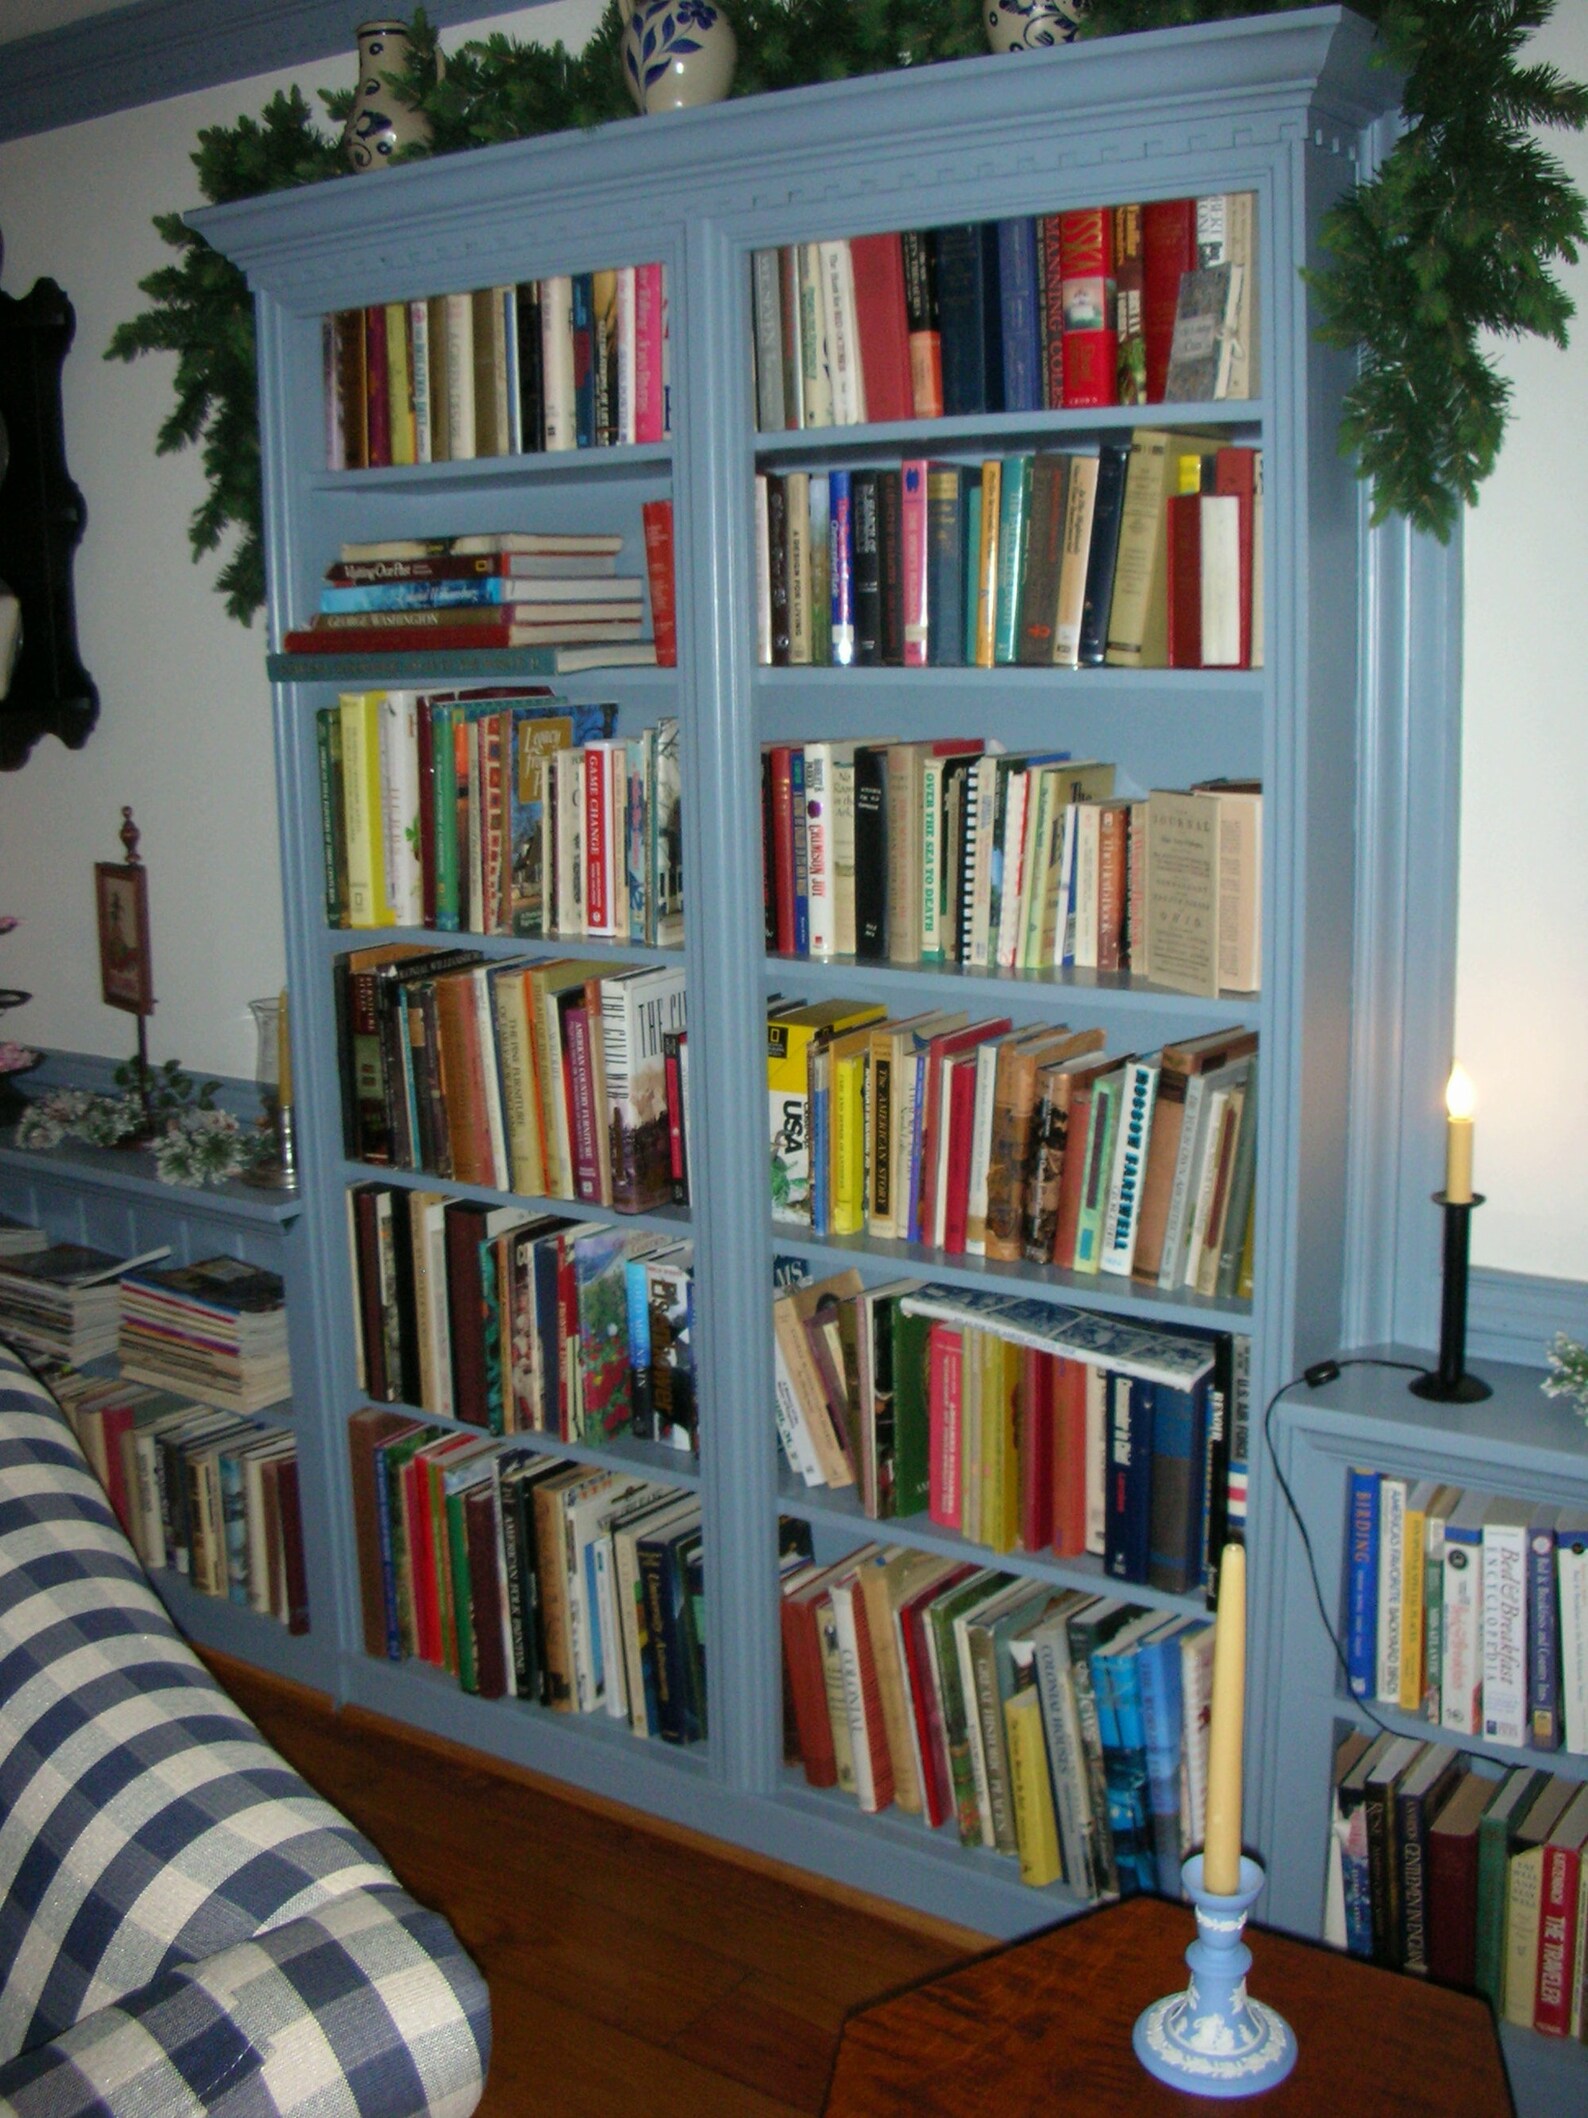
Step 5: Finishing Touches
Your bookcase is almost ready! Now it’s time to add the finishing touches that will make it look professional and polished. Here’s what you need to do:
- Sand the entire bookcase again to smooth out any rough edges.
- Apply paint or wood stain if desired. This is where you can get creative with colors and finishes.
- Finish with a protective coat of varnish or polyurethane to keep your bookcase looking great for years.
Pro tip: Use a high-quality brush or sprayer for a smooth, even finish. Don’t rush this step—it’s what makes your bookcase look professional.
Troubleshooting Common Issues
Even the best-laid plans can hit a snag. Here are some common issues you might encounter and how to fix them:
- Uneven shelves: Double-check your measurements and use a level to ensure everything is aligned.
- Loose joints: Add more glue or screws to reinforce weak spots.
- Uneven finish: Sand the area again and reapply paint or stain.
Don’t get discouraged if things don’t go perfectly the first time. Every project has its challenges, and part of the fun is figuring out how to overcome them.
Final Tips for Success
Building your own bookcase is a rewarding project, but it requires patience and attention to detail. Here are a few final tips to help you succeed:
- Take breaks if you feel frustrated. Stepping away for a bit can help you come back with fresh eyes.
- Ask for help if you need it. Whether it’s a friend or a professional, there’s no shame in getting assistance.
- Enjoy the process! Building something with your own hands is a truly fulfilling experience.
Remember, the goal isn’t perfection—it’s creating something that reflects your personality and adds value to your home.
Conclusion: Your Bookcase Awaits
You’ve made it to the end of this step-by-step guide on how to build your own bookcase. By following these instructions, you’re well on your way to creating a beautiful, functional piece of furniture that you can be proud of. Building your own bookcase isn’t just about saving money or customizing your space—it’s about the satisfaction of creating something with your own hands.
So, what are you waiting for? Grab your tools, gather your materials, and get started on your DIY journey. Once your bookcase is complete, share your masterpiece with the world! Leave a comment below to let us know how your project turned out, and don’t forget to check out our other DIY guides for more inspiration.
Table of Contents
- Why Building Your Own Bookcase is Worth It
- Tools and Materials You’ll Need
- Step 1: Planning Your Bookcase
- Step 2: Cutting the Wood
- Step 3: Assembling the Frame
- Step 4: Adding the Shelves
- Step 5: Finishing Touches
- Troubleshooting Common Issues
- Final Tips for Success
- Conclusion: Your Bookcase Awaits
Happy building, and don’t forget to share your progress with us! Cheers to your new DIY masterpiece.
- Short Haircuts For Curly Hair Over 60 Embrace Your Unique Style And Confidence
- Best Hairstyles For Over 50s Embrace Your Style With Confidence
How To Build Your Own Bookcase A StepbyStep DIY Guide
How To Build Your Own Bookcase A StepbyStep DIY Guide
Build Your Own Bookcase Pattern DIY Any Size Custom Bookshelf Etsy
