How To Create A Stunning DIY Ribbon Rose Bouquet Step-by-Step Guide
Creating your own DIY ribbon rose bouquet is one of the most rewarding crafts you can dive into. Whether you're planning for a special occasion, looking to brighten up your home, or simply want to surprise someone with a heartfelt gift, this step-by-step guide will walk you through every detail. Ribbon roses are not just beautiful—they're also versatile and long-lasting. So, grab your supplies and let’s get started!
Who says you need fresh flowers to make something magical? Ribbon roses are like the unsung heroes of the craft world. They're easy to make, budget-friendly, and they last forever. No more worrying about wilting petals or fading colors. This guide is packed with tips and tricks to ensure your bouquet looks absolutely stunning.
We’re going to break this down step-by-step, so even if you’ve never crafted before, you’ll feel like a pro by the end of it. Stick around, because we’re about to show you how to create something truly special that’ll impress anyone who lays eyes on it.
- Why Movierulz Pz Telugu Movies Download Is A Risky Bet
- Hairstyles For Older Women With Wavy Hair Embrace Your Natural Beauty
Here’s what we’ll cover:
- Tools and Materials You’ll Need
- Basic Ribbon Rose Tutorial
- Advanced Techniques for Perfect Roses
- How to Assemble Your Ribbon Rose Bouquet
- Customizing Your Bouquet
- Common Mistakes and How to Fix Them
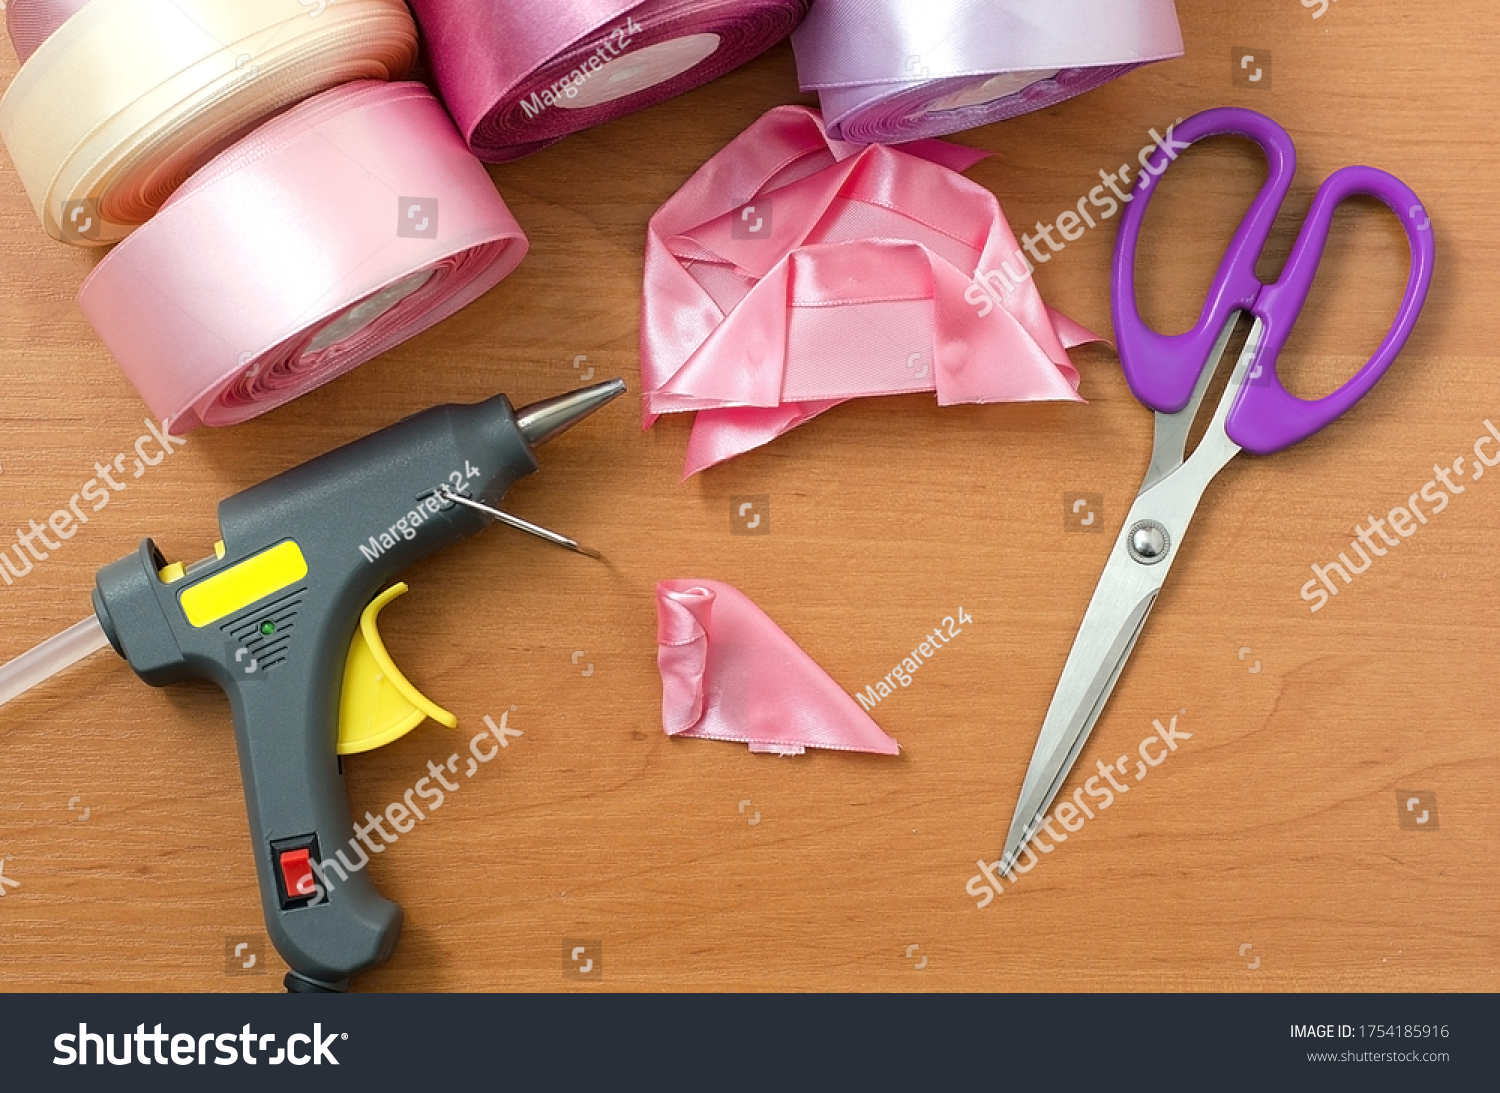
Tools and Materials You’ll Need
Before we dive into the actual creation process, let's talk about what you’ll need to gather. The right tools and materials can make all the difference when crafting your ribbon rose bouquet. Here’s a list to help you prepare:
Essential Supplies
- Ribbon (satin or silk work best)
- Hot glue gun and glue sticks
- Wire cutters
- Green floral wire (20-24 gauge)
- Floral tape
- Scissors
- Floral foam or bouquet holder (optional)
These basic supplies will get you started on creating beautiful ribbon roses. If you’re planning to go all out, consider adding decorative elements like beads, ribbons for wrapping the stems, or even some artificial greenery to enhance the look of your bouquet.
- Short Hairstyles Over 60 Fine Hair Embrace Your Inner Style Icon
- Long Haircuts For Women Over 60 Embrace Your Style With Confidence
Basic Ribbon Rose Tutorial
Alright, let’s start with the foundation of your bouquet—the ribbon roses themselves. This is where the magic happens. Follow these steps carefully, and you’ll have perfectly shaped roses in no time.
Step 1: Cut Your Ribbon
Decide on the size of your rose and cut a piece of ribbon accordingly. A good rule of thumb is to cut a piece that’s about 10-12 inches long for a medium-sized rose. Make sure your edges are clean and smooth for a polished look.
Step 2: Form the Base of the Rose
Take one end of the ribbon and fold it into a triangle. Hold it tightly with your fingers and secure it with a dab of hot glue. This will be the center of your rose. Keep in mind that the more layers you add here, the fuller your rose will look.
Step 3: Create the Petals
Continue folding the ribbon into loops, alternating directions as you go. Apply glue at the base of each loop to keep everything in place. Think of it like building a spiral. The more loops you add, the more intricate your rose will become.
Step 4: Secure the Stem
Once your rose is complete, wrap the base with floral tape to secure it. Then, attach a piece of green floral wire to the bottom and wrap it with tape as well. This will serve as the stem of your rose and make it easier to assemble the bouquet later on.
Advanced Techniques for Perfect Roses
Now that you’ve got the basics down, let’s take things up a notch. These advanced techniques will help you create roses that look even more realistic and stunning.
Shaping the Petals
Use your fingers or a small tool to gently curl the edges of the petals. This adds dimension and makes your roses look more natural. Don’t be afraid to experiment with different shapes and textures until you achieve the look you want.
Varying Sizes and Colors
One of the coolest things about ribbon roses is that you can customize them in countless ways. Try using ribbons in different shades or mixing and matching sizes to create a dynamic bouquet. For example, you could pair large, bold roses with smaller, delicate ones for a stunning contrast.
How to Assemble Your Ribbon Rose Bouquet
Once you’ve made enough roses, it’s time to assemble your bouquet. This is where everything comes together to create a cohesive and eye-catching arrangement.
Step 1: Plan Your Layout
Before you start gluing or tying things together, lay out your roses on a flat surface to plan the arrangement. Decide which roses will go in the center and which ones will form the outer layers. This will give you a clear vision of how your bouquet will look.
Step 2: Attach the Roses
Start by attaching the central roses to your bouquet holder or floral foam. Use hot glue or floral wire to secure them in place. Then, gradually add the outer roses, making sure to stagger them for a balanced look.
Step 3: Add Greenery
For an extra touch of elegance, incorporate some artificial greenery or filler flowers into your bouquet. This will add depth and texture, making your arrangement look even more professional.
Customizing Your Bouquet
One of the best things about DIY projects is the freedom to personalize them. Here are a few ideas to help you make your bouquet truly unique:
Add Embellishments
Consider adding beads, sequins, or even small charms to your roses. These little details can add a touch of sparkle and sophistication to your bouquet.
Experiment with Colors
Don’t limit yourself to traditional colors like red or pink. Try using metallic ribbons, pastel shades, or even bold neon hues to create a bouquet that stands out.
Create a Theme
Whether you’re crafting for a wedding, birthday, or holiday, consider designing your bouquet around a specific theme. For example, you could use seasonal colors or incorporate elements that reflect the recipient’s personality.
Common Mistakes and How to Fix Them
Even the most experienced crafters make mistakes sometimes. Here are a few common issues you might encounter and how to fix them:
Roses Look Flat
If your roses aren’t looking as dimensional as you’d like, try adding more loops or curling the petals more aggressively. You can also experiment with different ribbon widths to see what works best for your design.
Glue Not Holding
Make sure you’re using enough glue to secure each layer of your rose. If the glue isn’t holding, try letting it cool for a few seconds before applying it again. Sometimes, too much heat can cause the ribbon to warp.
Bouquet Looks Unbalanced
If your bouquet feels uneven, try rearranging the roses or adding more filler elements to fill in any gaps. You can also adjust the placement of the larger roses to create a more symmetrical look.
Why DIY Ribbon Rose Bouquets Are Worth It
Creating your own ribbon rose bouquet might seem intimidating at first, but trust me—it’s worth the effort. Not only do you get to customize every detail, but you also end up with a piece that’s completely one-of-a-kind. Plus, there’s something incredibly satisfying about making something beautiful with your own hands.
And let’s not forget the cost savings. While store-bought bouquets can be expensive, crafting your own allows you to control the budget. You can choose exactly how much you want to spend on materials, and the end result will still look just as amazing—if not better!
Final Tips and Tricks
Here are a few final tips to keep in mind as you work on your DIY ribbon rose bouquet:
- Take your time. Rushing through the process can lead to mistakes, so pace yourself and enjoy the journey.
- Practice makes perfect. If your first attempt doesn’t turn out exactly as you hoped, don’t get discouraged. Keep trying, and you’ll get better with each project.
- Have fun! Crafting should be enjoyable, so don’t stress too much about perfection. Let your creativity shine and embrace the imperfections.
Conclusion
Congratulations—you’ve made it to the end of this step-by-step guide on how to create a stunning DIY ribbon rose bouquet! By now, you should feel confident in your ability to craft beautiful, personalized bouquets that will impress anyone who sees them.
Remember, the key to success is practice and patience. Don’t be afraid to experiment with different techniques and materials until you find what works best for you. And most importantly, have fun with it!
So, what are you waiting for? Grab your supplies and get crafting. And when you’re done, don’t forget to share your masterpiece with the world. Who knows—you might just inspire someone else to try their hand at crafting their own bouquet!
- Hairstyles With Glasses And Bangs The Ultimate Guide For A Flawless Look
- Low Maintenance Short Over The Ear Haircuts The Ultimate Guide To Stylish And Effortless Looks
Stepbystep Instruction Rose Made Satin Ribbon Stock Photo (Edit Now

DIY Ribbon Flower Bouquet

8 Roses Bouquet, Roses Bouquet, Satin Ribbon Rose Bouquet, Happy
