Unlock The Power Of Remote IoT Web SSH: A Comprehensive Guide To Downloading Ubuntu
Hey there, tech-savvy friend! If you're reading this, chances are you're diving headfirst into the world of remote IoT web SSH and Ubuntu. Let's be real—this isn't just another buzzword; it's a game-changer for anyone looking to control their IoT devices remotely. Whether you're a seasoned developer or just starting out, mastering remote IoT web SSH and downloading Ubuntu can open doors you didn’t even know existed. So, grab your coffee, sit back, and let’s unravel the mysteries of remote IoT web SSH together.
In this article, we’re going to break down everything you need to know about setting up a remote IoT web SSH environment on Ubuntu. We’ll cover everything from the basics to advanced tips, ensuring you’re equipped with the knowledge to make your IoT dreams a reality. This isn’t just another tutorial—it’s a roadmap to success.
Now, before we dive deep into the technicalities, let's set the stage. Why is remote IoT web SSH so important? Simply put, it allows you to manage and interact with your IoT devices from anywhere in the world. Combine that with Ubuntu, and you’ve got a powerhouse setup that’s both reliable and efficient. Ready to get started? Let’s go!
- Short Bob Hairstyles For Over 60s A Fresh Look That Keeps You Stylish And Confident
- Chubby Blond Mature Embracing Natural Beauty And Radiance
What Exactly is Remote IoT Web SSH?
Alright, let's get down to business. Remote IoT web SSH, in a nutshell, is the ability to securely access and manage your IoT devices over the internet using SSH (Secure Shell). This technology is like having a remote control for your IoT setup, but way cooler and way more secure. SSH ensures that your communication with the device is encrypted, keeping prying eyes at bay.
For those who are new to this, SSH is a network protocol that allows you to log into another computer over a network, execute commands, and move files from one machine to another. When combined with IoT, it becomes a powerful tool for remote management, troubleshooting, and automation.
Here’s why remote IoT web SSH is a must-have:
- Shine Facial Bar Auburn The Ultimate Spot For Radiant Skin
- Why Older Womens Hairstyles Bobs Are The Ultimate Game Changer
- Enhanced security through encryption
- Easy access to devices from anywhere
- Efficient troubleshooting and maintenance
- Scalability for managing multiple devices
Why Choose Ubuntu for Remote IoT Web SSH?
Ubuntu has long been the go-to choice for developers and tech enthusiasts alike. But what makes it so special when it comes to remote IoT web SSH? Ubuntu offers a robust, stable, and secure environment that’s perfect for running SSH servers. Plus, its vast community and extensive documentation make troubleshooting a breeze.
Here are some key reasons why Ubuntu stands out:
- Regular updates and security patches
- Wide range of supported hardware
- Easy installation and setup
- Extensive library of applications and tools
Setting Up Ubuntu for IoT
Before we jump into SSH, let’s talk about setting up Ubuntu for your IoT devices. The first step is downloading the correct version of Ubuntu. For IoT devices, Ubuntu Core is often the preferred choice due to its lightweight nature and focus on security.
Here’s a quick guide to getting started:
- Visit the official Ubuntu website and download the latest version of Ubuntu Core.
- Follow the installation instructions specific to your hardware.
- Ensure your device is connected to the internet during installation.
Downloading Ubuntu: Step-by-Step Guide
Now that we’ve covered why Ubuntu is the ideal choice, let’s walk through the process of downloading it. This step is crucial, as having the right version of Ubuntu will make your SSH setup much smoother.
Step 1: Choose the Right Version
Ubuntu offers several versions tailored to different needs. For IoT devices, you’ll want to focus on Ubuntu Core or the Server edition. These versions are lightweight and optimized for running headless systems.
Step 2: Download the ISO File
Head over to the official Ubuntu website and download the ISO file for your chosen version. Make sure to verify the checksum of the file to ensure its integrity.
Step 3: Create a Bootable USB Drive
Once you’ve downloaded the ISO file, you’ll need to create a bootable USB drive. Tools like Rufus (for Windows) or Etcher (for macOS and Linux) can help you with this process. Simply select the ISO file and follow the prompts to create your bootable drive.
Configuring SSH on Ubuntu
With Ubuntu installed, it’s time to set up SSH. This is where the magic happens, as SSH will allow you to remotely access your IoT devices. Don’t worry—it’s easier than it sounds.
Step 1: Install OpenSSH Server
The first step is installing the OpenSSH server. Open a terminal on your Ubuntu machine and run the following command:
sudo apt update && sudo apt install openssh-server
This command will update your package list and install the OpenSSH server. Once the installation is complete, you can verify that SSH is running by checking its status:
sudo systemctl status ssh
Step 2: Configure SSH Settings
After installing the server, you might want to tweak some settings to enhance security. The SSH configuration file is located at /etc/ssh/sshd_config. Open it with your favorite text editor:
sudo nano /etc/ssh/sshd_config
Here are some settings you might consider changing:
- Port: Change the default port (22) to something less common.
- PasswordAuthentication: Set this to no to disable password-based authentication.
- PermitRootLogin: Set this to no to prevent root login.
Connecting to Your IoT Device via SSH
Now that SSH is up and running, it’s time to connect to your IoT device. This can be done using any SSH client, such as PuTTY (for Windows) or the built-in terminal on macOS and Linux.
Step 1: Get the IP Address
Before you can connect, you’ll need the IP address of your IoT device. You can find this by running the following command on your device:
ifconfig
Look for the inet address under the appropriate network interface (usually wlan0 or eth0).
Step 2: Connect Using SSH
With the IP address in hand, you can now connect to your device. Open your SSH client and enter the following command:
ssh username@ip_address
Replace "username" with your actual username and "ip_address" with the IP address of your device. If everything is set up correctly, you should be prompted for your password or key.
Enhancing Security for Remote IoT Web SSH
Security is paramount when it comes to remote IoT web SSH. Here are some tips to help you secure your setup:
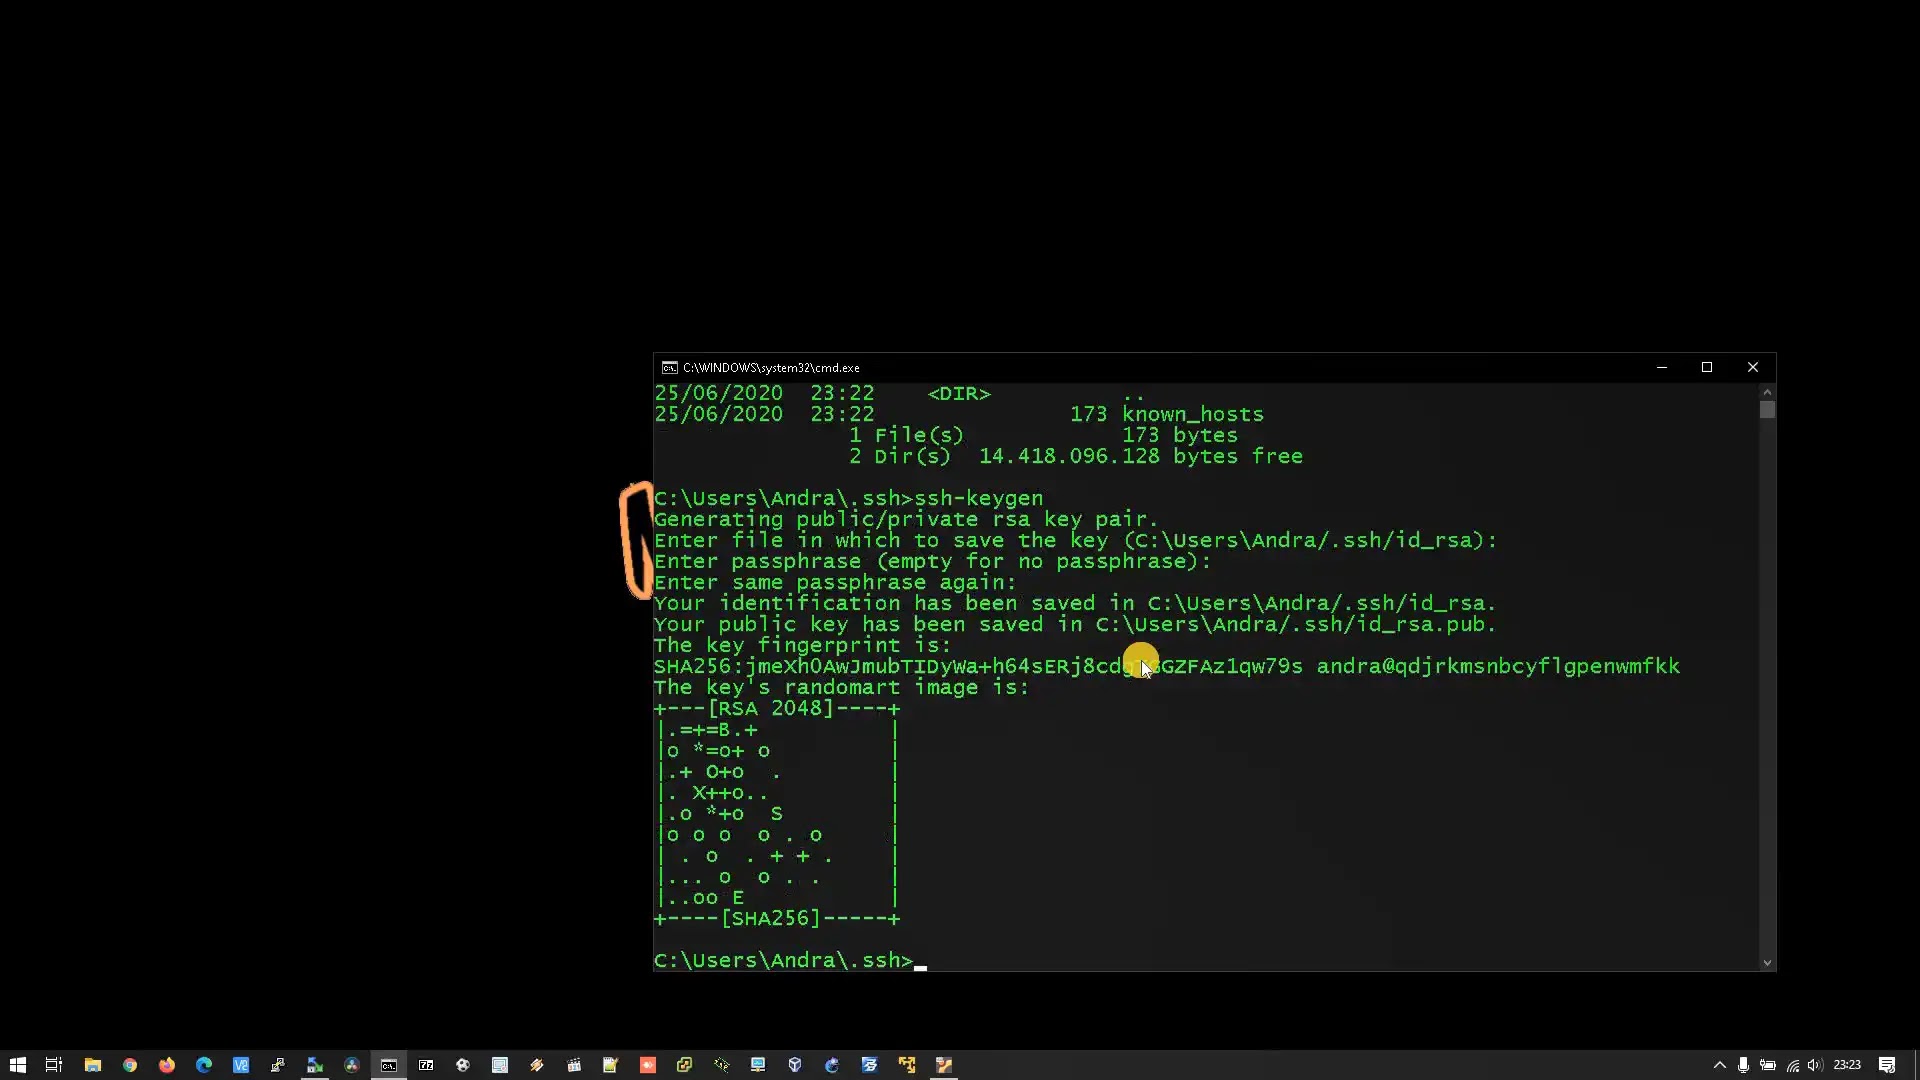
Use SSH Keys Instead of Passwords
SSH keys provide a more secure method of authentication than passwords. To set them up, follow these steps:
- Generate a key pair using the ssh-keygen command.
- Copy the public key to your IoT device using ssh-copy-id.
- Disable password-based authentication in the SSH config file.
Set Up a Firewall
A firewall can help protect your device from unauthorized access. Ubuntu comes with a built-in firewall called UFW (Uncomplicated Firewall). To enable it, run the following commands:
sudo ufw allow ssh
sudo ufw enable
Troubleshooting Common Issues
Even the best-laid plans can hit a snag. Here are some common issues you might encounter and how to fix them:
Connection Refused
If you’re unable to connect to your device, double-check the following:
- Ensure the SSH service is running.
- Verify the IP address and port number.
- Check your firewall settings to ensure SSH traffic is allowed.
Authentication Failed
If you’re getting authentication errors, try the following:
- Ensure your SSH keys are correctly set up.
- Check the permissions on your authorized_keys file.
- Verify that password-based authentication is enabled if you’re using a password.
Future Trends in Remote IoT Web SSH
The world of remote IoT web SSH is constantly evolving. As more devices become connected, the need for secure and efficient remote management solutions will only increase. Here are some trends to watch out for:
Increased Use of AI and Machine Learning
AI and machine learning are starting to play a bigger role in IoT management. These technologies can help automate tasks, predict failures, and optimize performance.
5G and Edge Computing
With the rollout of 5G networks, we can expect faster and more reliable connections for IoT devices. Edge computing will also become more prevalent, allowing for faster processing and reduced latency.
Conclusion
And there you have it—a comprehensive guide to remote IoT web SSH and downloading Ubuntu. By following the steps outlined in this article, you should now have a solid understanding of how to set up and manage your IoT devices remotely. Remember, security is key, so always take the necessary precautions to protect your setup.
Now it’s your turn to take action. Whether it’s setting up SSH on your Ubuntu device or exploring the latest trends in IoT, the possibilities are endless. Don’t forget to share your thoughts and experiences in the comments below. And if you found this article helpful, be sure to check out our other guides for more tech tips and tricks. Happy hacking!
Table of Contents
- What Exactly is Remote IoT Web SSH?
- Why Choose Ubuntu for Remote IoT Web SSH?
- Setting Up Ubuntu for IoT
- Downloading Ubuntu: Step-by-Step Guide
- Configuring SSH on Ubuntu
- Connecting to Your IoT Device via SSH
- Enhancing Security for Remote IoT Web SSH
- Troubleshooting Common Issues
- Future Trends in Remote IoT Web SSH
- Conclusion
- 60yearold Women Hairstyles That Embrace Your Inner Fabulousness
- Movierulz Puspa The Ultimate Guide To Streaming And Downloading Movies

How To Securely Connect Remote IoT Devices Using P2P SSH On Ubuntu
How to remote SSH to Ubuntu Server 20.04 root Without Password Using
HOWTO Run your IoT GUI on your desktop Docs Ubuntu Community Hub
